What is Automation Studio?
Automation Studio lets you build HR processes in Simployer One that run themselves. Instead of manually sending a welcome email, creating an IT ticket, and reminding a manager to book a 1:1 every time someone joins, you set up that sequence once, and Simployer One runs it automatically every time it applies.
You build automations on a canvas by connecting steps together. No code, scripts, or developer involvement is required.
What can I automate with Automation Studio?
Automation Studio reacts to events that happen in Simployer One and to dates on the calendar. Common examples include:
- Onboarding. A new employee's start date approaches, so tasks go out to IT, the manager, and payroll, and the employee receives a welcome message.
- Offboarding. An employment ends, so equipment return, access revocation, and handover tasks are created in the right order.
- Role changes. An employee moves department, changes job title, or gets a new manager, so access is updated, the new manager is briefed, and the handover is documented.
- Parental leave. An upcoming leave is registered, so handover tasks are created before it starts, and the return-to-work conversation is prompted before the employee comes back.
- Milestones. Birthdays, work anniversaries, and probation end dates trigger reminders or manager tasks.
Automation Studio is built for HR processes that follow a repeatable pattern.
What are the key concepts in Automation Studio?
Six terms cover almost everything in Automation Studio.
Automation. An automation is one complete process you build and switch on in Automation Studio. It has a name, a trigger, and a set of steps. All your automations are listed on the Automations page.
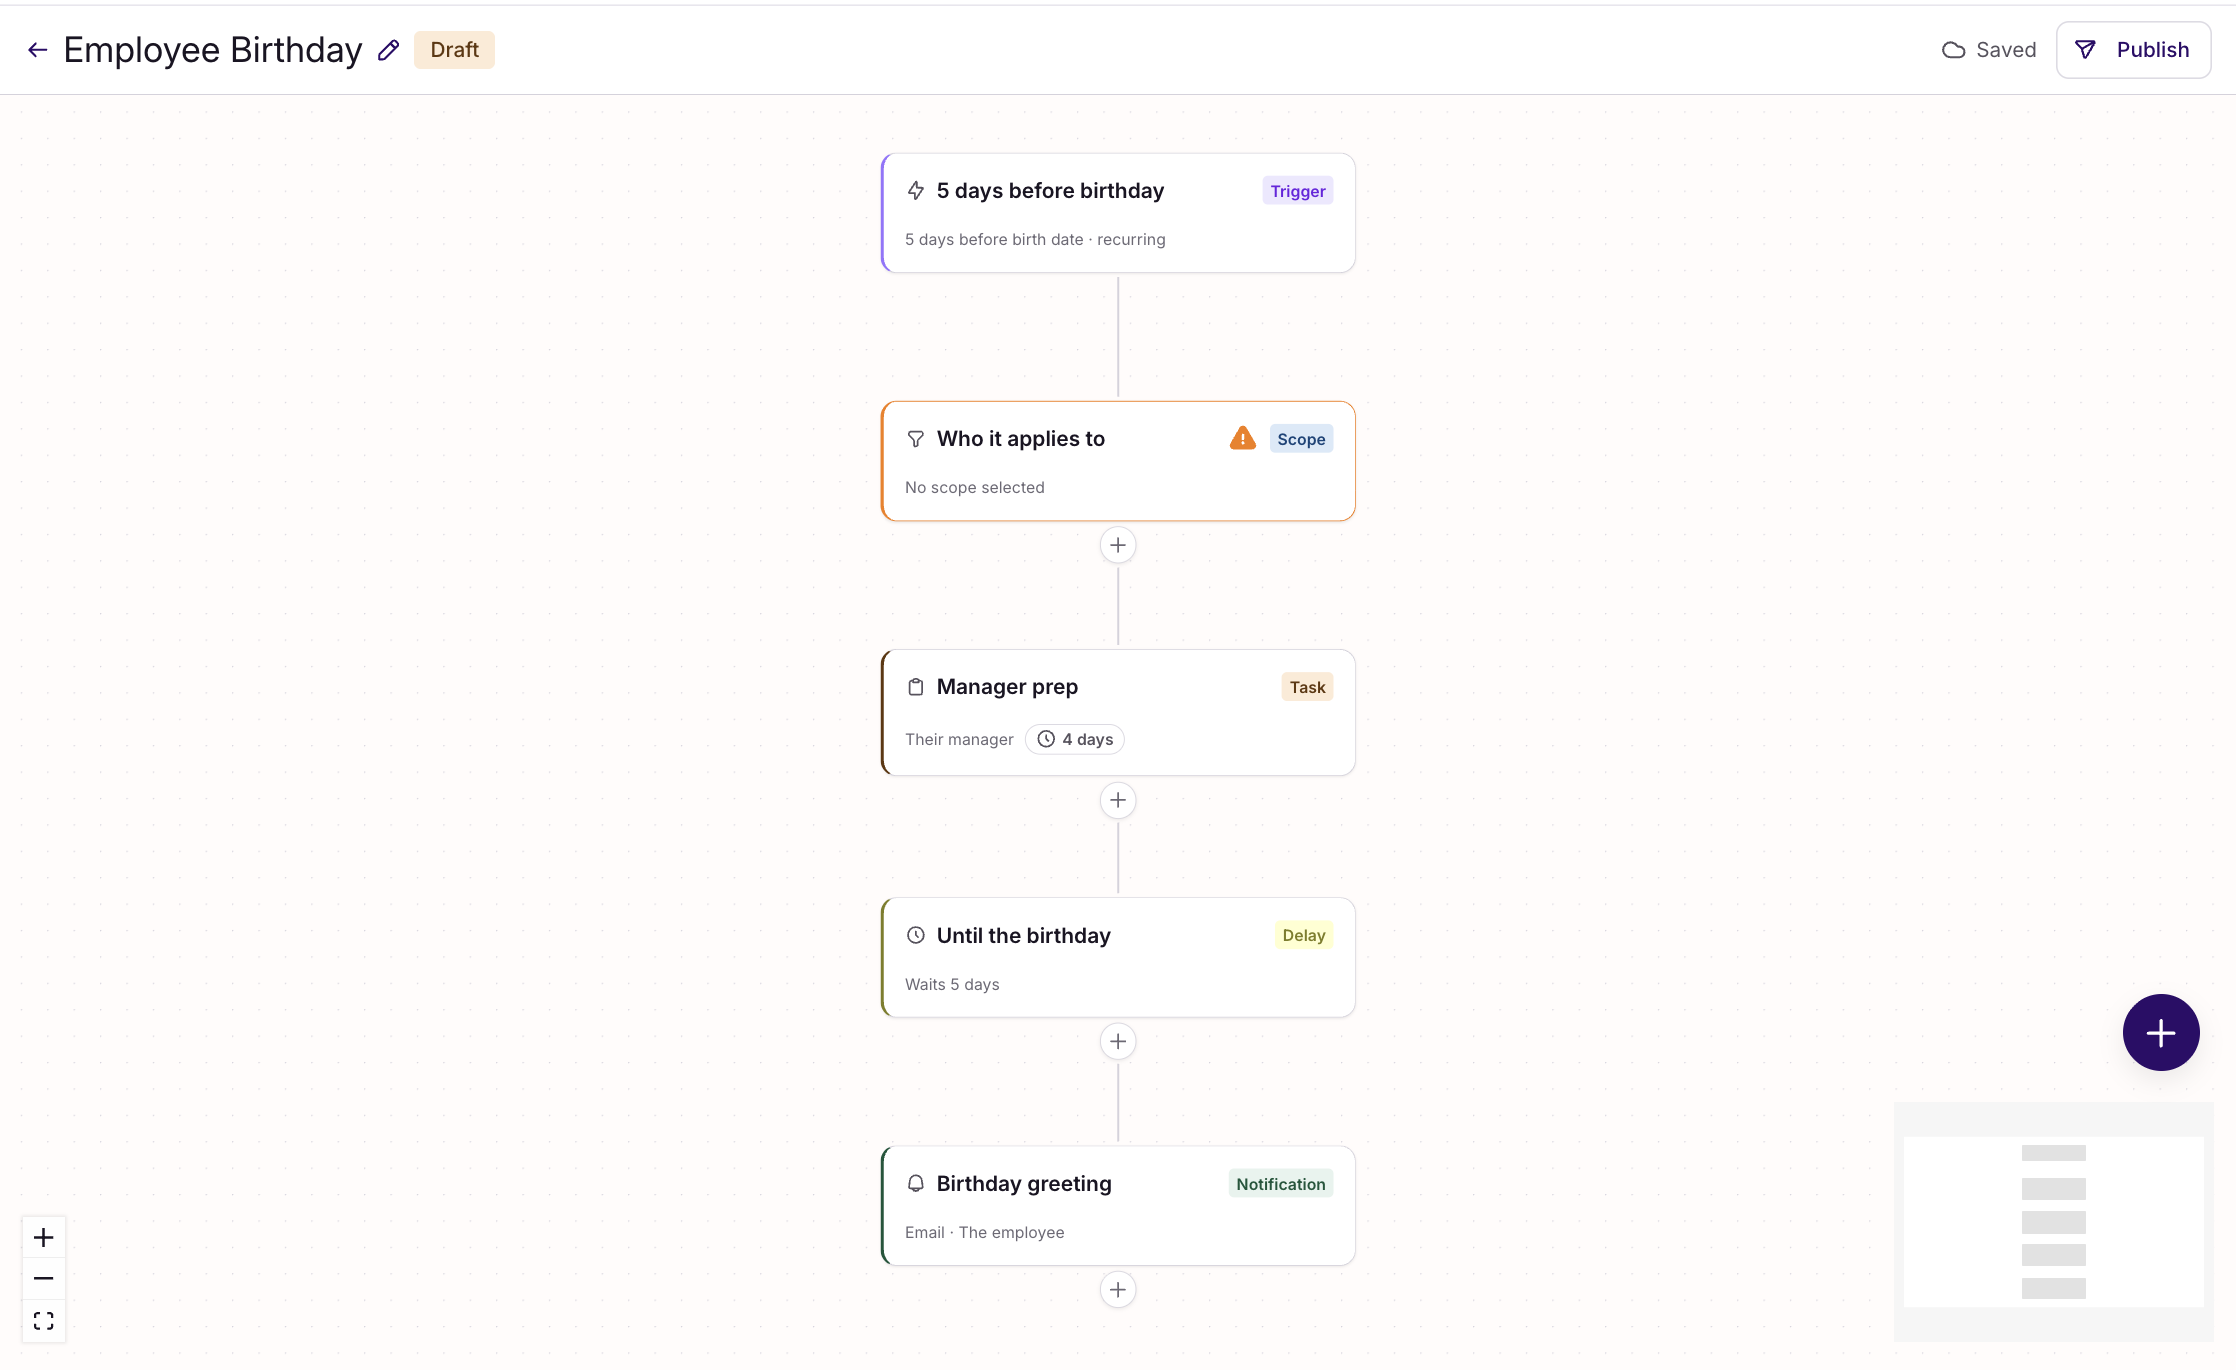
Canvas. The canvas is the workspace where you build an automation. Steps appear as boxes connected by lines, read from top to bottom, so you can see the whole process at a glance.
Node. A node is one step in an automation. Each node does a single job, such as creating a task, sending a notification, waiting, or sending data to another system. You add nodes to the canvas and connect them in the order you want them to run.
Trigger. A trigger is the event that starts an automation. Every automation has exactly one trigger. It can be a change in Simployer One (for example, an employment ends, or a manager changes) or a date-based event (for example, 14 days before a start date, or on a birthday).
Scope. Scope determines who an automation applies to. Without scope, an onboarding automation would run for every new joiner in the company. With scope set, you can narrow it to a single department, office, or team.
Run. A run is one execution of an automation for one employee. For example, if five employees start on the same Monday, an onboarding automation produces five separate runs. Each run has its own history, so you can check exactly what happened for one specific employee.
Two more worth knowing:
Draft vs. active. A newly created automation is a draft and does nothing. It only starts reacting to events once you publish it and it becomes active.
Version. Editing an active automation creates a new version of it. Runs already in progress continue on the version they started on, so editing an automation today does not change a process that is already halfway through for an employee.
How to build yout first automation
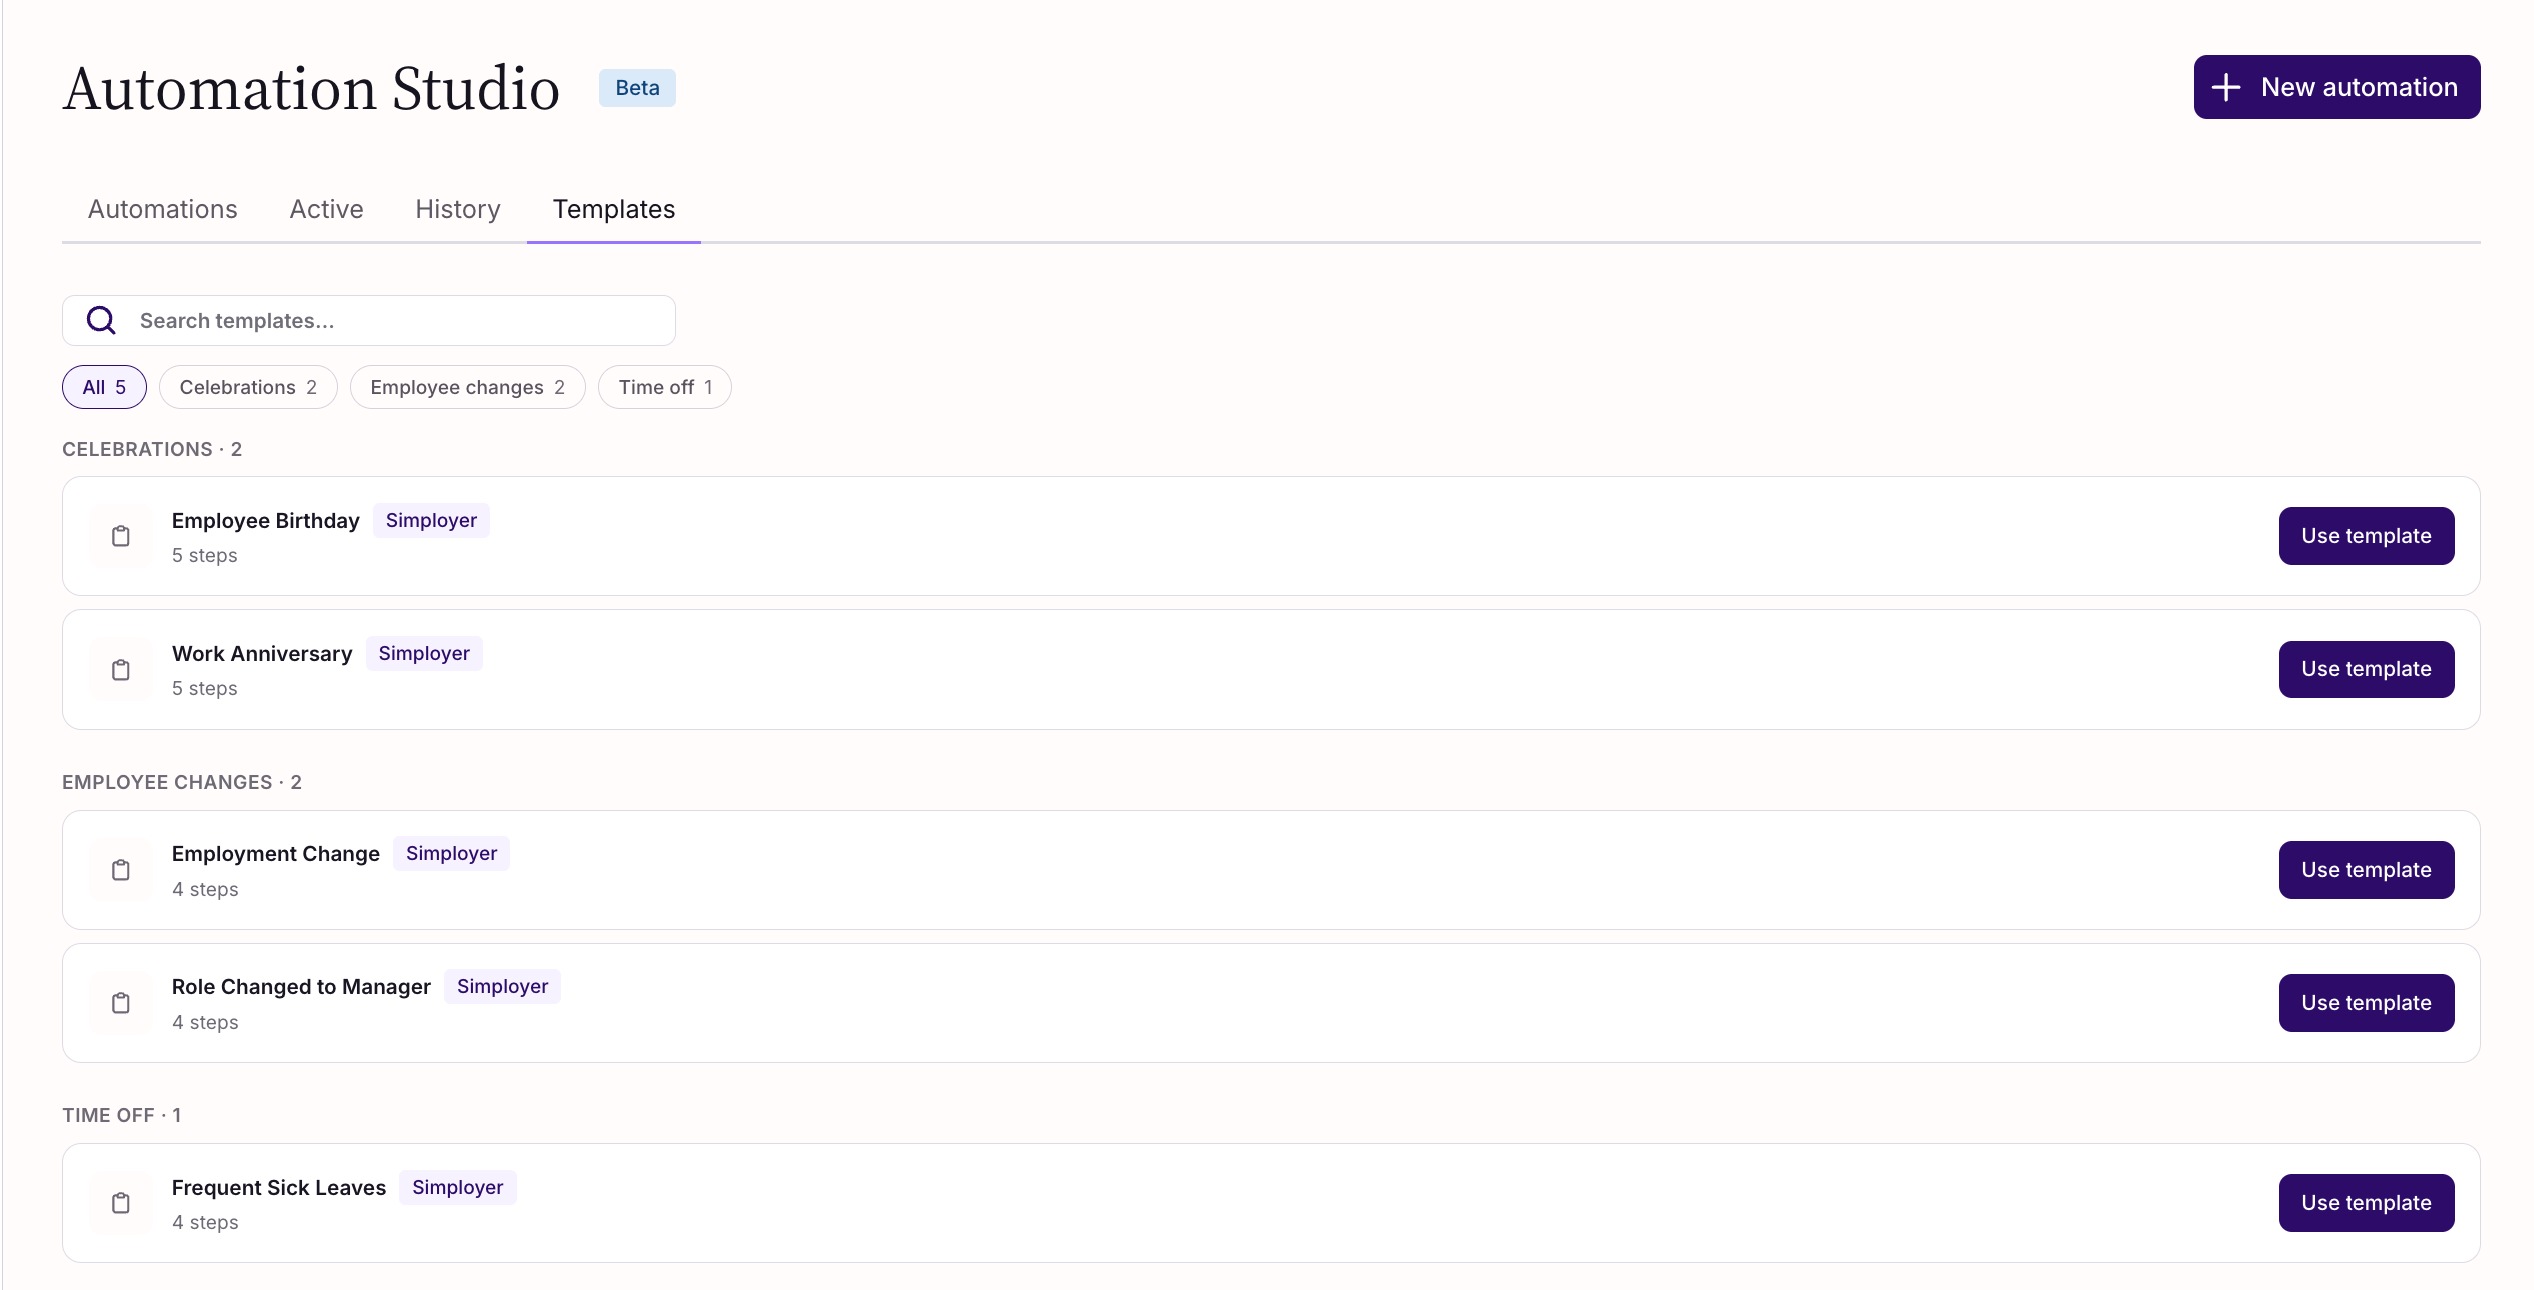
The fastest way to build your first automation is to start from a template. Templates are pre-built automations covering processes most HR teams run, and you can change anything in them.
- Go to Automation Studio and open the Templates tab.
- Pick a template. Employee Birthday is a good first choice — it's short, low-risk, and easy to verify.
- Review the trigger. The template comes with one already set. Read it and confirm it's the event you expect.
- Set the scope. Templates ship without a scope, so you must choose who the automation applies to. Start narrow — your own department or a single team — rather than the whole organisation.
- Check each node. Open every step and review its settings. Templates fill in sensible defaults, but message text, task assignees, and timings usually need adjusting to match how your organisation works.
- Publish the automation. It now runs whenever the trigger fires.
- Come back and check. After the first run, open the run history and confirm it did what you expected.
Tip: Build one small template-based automation before creating one from scratch. The core concepts land much faster once you've watched one work.
Important: Start small. An automation that runs for the whole company on day one is hard to correct. Scope it to one department, watch a few real runs, then widen it.
Administration and governance
Who can build automations?
Automation Studio is available to users with the Admin or Owner role in Simployer One. Anyone with either role can create, edit, publish, and pause automations, and can see every automation in the organisation, not only their own.
This matters for two reasons:
- Automations built by one admin can be changed or paused by another. There is no per-automation ownership or locking, so agree internally who looks after which processes.
- Managers and employees cannot open Automation Studio. They will see the results — tasks assigned to them, notifications they receive — but not the automation that produced them, and not the canvas.
What gets recorded for each automation run?
Every run is logged. For each run, you can see which employee it ran for, when it started, which nodes ran, what each node did, and whether anything failed. This is what makes an automation auditable — you can answer “was this actually done, and when?” months later.
How do I pause an automation?
You can pause an active automation at any time. Pausing stops it from reacting to new events.
Was this article helpful?
That’s Great!
Thank you for your feedback
Sorry! We couldn't be helpful
Thank you for your feedback
Feedback sent
We appreciate your effort and will try to fix the article